
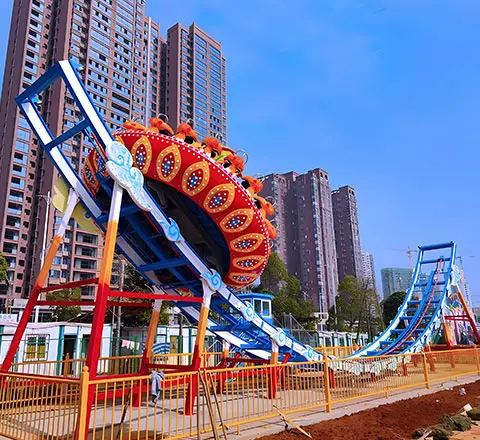


Proper Tagada ride installation is one of the most important steps in building a safe and profitable amusement ride project. A disco Tagada ride is not a simple plug-and-play attraction. It combines rotation, bouncing motion, music, lighting, passenger movement and repeated dynamic load. If the site preparation, foundation, wiring, mechanical assembly or safety commissioning is not done correctly, the ride may suffer from vibration, abnormal noise, faster wear, inspection problems or unsafe operation.
The key principle is clear:
A Tagada ride should be installed on a stable, level and properly prepared site, with enough operating space, safe passenger flow, reliable power supply, correct mechanical alignment, complete fencing and full testing before public operation.
This guide is written for amusement park owners, carnival operators, funfair businesses, family entertainment centers, mall attraction investors and tourist site developers who are planning to install a Tagada ride, disco Tagada, mini disco Tagada, Tagada fair ride, Tagada carnival ride, Crazy Round Disco ride, Crazy Dance Disco ride or music turntable ride.

Why Tagada Ride Installation Matters
A Tagada ride creates a very different load pattern from a carousel or ordinary rotating ride. During operation, the main bowl-shaped turntable rotates while the platform may tilt, bounce or move rhythmically with music. Riders also shift their body weight as they hold the handrail, slide, laugh and react to the movement.
This means the installation quality affects much more than appearance. It directly influences:
- Ride stability
- Passenger safety
- Mechanical service life
- Bearing and motor wear
- Electrical reliability
- Inspection approval
- Operator confidence
- Downtime during peak seasons
- Long-term return on investment
Before installation starts, the buyer should already know the required site size, foundation method, power supply, unloading access, safety fence layout, control cabinet position and testing process.
If you want to better understand the ride movement before installation, read our guide on how a disco Tagada ride works.
Site Preparation Before Installing a Tagada Ride
Good Tagada ride installation begins before the equipment arrives. The site should be checked by the buyer, manufacturer and local engineering team where necessary.
Ground Bearing and Levelness
The ground should be solid, stable and suitable for dynamic amusement ride operation. For large fixed disco Tagada rides, many projects require a reinforced concrete foundation or engineered base according to manufacturer drawings.
As a planning reference, some large fixed Tagada ride projects may require strong ground bearing capacity, such as 10t/m² or higher, depending on the ride size, local soil condition and engineering design. The final requirement must follow the supplier’s drawings and local structural engineer’s advice.
The surface should also be level. A visibly sloped or uneven site is not suitable for direct installation. If a rough civil survey shows unevenness, the final machine base still needs precise leveling during installation. Poor levelness can cause:
- Uneven load distribution
- Abnormal vibration
- Faster bearing wear
- Platform leaning
- Increased stress on the drive system
- Unstable rider experience
For mountainous parks, hillside scenic areas or sloped tourist attractions, the main equipment should be installed on a leveled concrete platform rather than directly on the slope.

Site Access and Unloading
Before shipment, confirm whether the equipment can actually reach the installation position. A 24-seat, 30-seat or 40-seat disco Tagada ride includes large structural components, so access planning is very important.
Check:
- Road width
- Gate height
- Turning space for trucks
- Crane or forklift access
- Indoor doorway size
- Floor route from unloading point to installation area
- Whether the site allows temporary lifting work
- Whether the installation zone can be closed during assembly
Many delays happen not because the ride is difficult to assemble, but because the site was not ready for unloading.
Tagada Ride Space Requirements
A Tagada ride needs more space than the turntable diameter alone. Buyers must reserve room for stairs, fence, queue area, control cabinet, maintenance access and spectator movement.
A large 6-meter disco Tagada ride may need an overall planning area of about 12m × 14m when stairs, operating clearance, safety fencing and visitor access are included. Smaller mini Tagada rides need much less space, but they still require a controlled riding area.
| Ride Type | Common Capacity | Common Capacity | Space Planning Notes |
| Mini Disco Tagada Ride | 8–10 riders | Indoor FECs, malls, compact parks | Small footprint, but still needs fence and safe entry |
| Small Tagada Ride | 16 riders | Small parks, plaza events, local fairs | Requires stairs, control area and queue planning |
| Medium Disco Tagada Ride | 20–24 riders | Funfairs, night markets, amusement zones | Needs wider operating area and crowd separation |
| Standard Tagada Ride | 30 riders | Carnivals, amusement parks, tourist attractions | Requires clear fencing, lighting and access routes |
| Large Tagada Ride | 36–40 riders | Large parks, festivals, high-traffic outdoor venues | Needs stronger site planning and larger safety area |

Safety Buffer Around the Ride
A safety buffer should be reserved outside the maximum ride operating area. In many commercial layouts, a buffer of around 1.5 meters or more is a practical planning reference, but the final distance should follow local rules and manufacturer layout drawings.
The buffer zone should not contain:
- Other amusement equipment
- Food carts
- Temporary booths
- Loose chairs
- Electrical boxes
- Storage items
- Advertising boards
- Visitor pathways too close to moving parts
A good layout separates the riding area, waiting area, viewing area and operator area.
Foundation Requirements for Fixed Tagada Rides
Fixed Tagada rides are used for long-term operation in amusement parks, FECs, night markets, tourist resorts and permanent outdoor entertainment zones. For these projects, foundation preparation is critical.
Concrete Foundation and Anchor Bolts
Large fixed models usually need a concrete foundation or engineered platform. Depending on the model, the base may be secured with anchor bolts, embedded bolts or steel foundation plates.
The foundation design should consider:
- Equipment weight
- Passenger load
- Dynamic rotation and bouncing load
- Soil condition
- Ground bearing capacity
- Anchor bolt layout
- Concrete strength
- Levelness
- Drainage
- Maintenance access
- Local amusement ride inspection requirements
If chemical anchor bolts are used, the curing time should follow the anchor manufacturer’s instruction. In many engineering practices, installers allow sufficient curing time before applying dynamic load. The exact time depends on the adhesive, temperature and site condition.
Indoor Foundation and Floor Load
Mini Tagada rides and some small Tagada models can be installed indoors, but indoor installation still needs professional checking.
Before installing a Tagada kiddie ride or mini disco Tagada inside a mall or FEC, confirm:
- Floor load capacity
- Ceiling height
- Door access
- Fire exit clearance
- Ventilation
- Cable routing
- Noise and vibration impact
- Visitor flow around the ride
A mini Tagada ride is smaller than a full-size amusement park model, but it is still a mechanical amusement ride. It should not be treated like a simple arcade machine.
Fixed Tagada Ride vs Trailer-Mounted Tagada Ride Installation
Installation requirements are different for fixed and trailer-mounted models.
A fixed Tagada ride is installed in one permanent or semi-permanent location. It usually requires more attention to foundation, anchoring, fencing and long-term site planning.
A trailer-mounted Tagada ride is designed for mobile operators who travel between carnivals, funfairs, festivals and temporary amusement sites. It is built on a trailer chassis and may use hydraulic folding or leveling systems to reduce setup time.

| Item | Fixed Tagada Ride | Trailer-Mounted Tagada Ride |
| Best For | Parks, FECs, night markets, tourist attractions | Traveling carnivals, funfairs, seasonal festivals |
| Foundation | Stable ground, anchor layout and long-term base preparation | Level ground, support legs, chassis stability and safe setup |
| Mobility | Low | High |
| Setup Logic | More preparation before installation | Faster relocation and repeated setup |
| Cost Logic | Usually lower initial equipment cost | Higher initial cost, but can earn from multiple locations |
| Buyer Type | Fixed venue owner | Mobile ride operator |
A trailer-mounted Tagada ride does not mean the operator can ignore site preparation. The ground must still be level, the support legs must be stable, the electrical connection must be safe and the public area must be fenced before operation.
Power Supply and Electrical Installation
A commercial Tagada ride needs reliable power for the motor, control cabinet, lighting, music system and sometimes hydraulic or pneumatic equipment.
Common commercial models may use industrial power such as 380V / 50Hz or 380V / 60Hz, depending on the destination country and ride configuration. The final voltage, frequency and power capacity should be confirmed before production.
Electrical Planning Checklist
Before installation, confirm:
- Local voltage and frequency
- Total power demand
- Control cabinet position
- Grounding system
- Cable routing
- Waterproof protection for outdoor projects
- Emergency stop wiring
- Lighting and music load
- Power cable protection
- Local electrical inspection rules
For better signal stability, high-voltage power cables and low-voltage signal cables should be routed separately where possible. As a practical engineering reference, keeping a separation distance such as 30cm or more can help reduce electromagnetic interference, but the final wiring method should follow the manufacturer’s electrical drawing.
Control Cabinet Position
The control cabinet should be placed where the operator can clearly see the entire riding platform, entrance, exit and passenger behavior. The operator must be able to stop the ride quickly if riders stand up, let go of the handrail, push others or show unsafe behavior.
A good control position is a safety feature, not just an operation convenience.
Mechanical Assembly: Main Steps for Disco Tagada Ride Setup
Actual installation should be completed by qualified technicians or under manufacturer guidance. The following sequence gives buyers a clear idea of what happens during a professional disco Tagada ride setup.

Step 1: Unpack and Inspect All Components
After the equipment arrives, check every part according to the packing list.
Typical components include:
- Main frame
- Base structure
- Central turntable
- Slewing ring or bearing system
- Motor and drive system
- Hydraulic or pneumatic parts
- Control cabinet
- Lighting system
- Music system
- Seats and soft padding
- Handrails
- Stairs and platform
- Safety fence
- Fasteners and spare parts
Take photos of any transport damage before assembly.
Step 2: Position the Base and Main Frame
The base must be positioned according to the installation drawing. Levelness should be checked carefully before the main rotating structure is installed.
For fixed models, the base is connected to the prepared foundation. For trailer-mounted models, the chassis and support legs should be adjusted until the whole unit is stable and level.
Step 3: Install the Slewing Ring and Turntable System
The slewing ring or large bearing system is one of the key mechanical parts of a disco Tagada turntable ride. It supports the rotation of the platform and must be installed with correct alignment and lubrication.
During this step, technicians should check:
- Bearing surface cleanliness
- Grease application
- Bolt tightening sequence
- Rotation smoothness
- Clearance around moving parts
- Alignment with the central axis
High-strength bolts should be tightened according to the supplier’s torque requirements. A cross-tightening method is commonly used to avoid uneven stress.
Step 4: Install Motor, Drive and Motion System
The motor and drive system control the movement of the Tagada ride. Depending on the model, the ride may use mechanical drive, hydraulic movement, pneumatic movement or a combination of systems.
Technicians should check:
- Motor direction
- Coupling alignment
- Drive connection
- Hydraulic or pneumatic pipe connection
- Air tank or oil pump condition
- Pressure system
- Leakage
- Abnormal vibration
- Protective covers
If flexible couplings are used, alignment should be checked carefully. Small alignment errors can cause vibration and long-term wear.
Step 5: Install Seats, Padding and Handrails
The passenger area is where safety and comfort meet. Seats, soft padding and handrails must be firmly fixed.
Check:
- Handrail strength
- Padding thickness
- Seat fixation
- Non-slip surface
- No sharp edges
- No exposed hard parts
- No loose bolts
- No torn soft material
For younger riders or a mini Tagada ride, the soft padding and handrail design are especially important. To understand rider suitability, you can read our guide on what age is appropriate for a Tagada ride.
Step 6: Install Stairs, Platform and Safety Fence
After the main structure is in position, install the stairs, entry platform and safety fence. These parts control how riders enter and leave the attraction.
Stairs and platforms should be:
- Stable
- Non-slip
- Well aligned
- Easy to supervise
- Properly lit for night operation
The safety fence should clearly separate the moving ride from spectators and waiting riders.
Step 7: Connect the Control System, Lighting and Music
A Tagada ride video often shows bright lights, loud music and riders dancing with the motion. Behind that atmosphere is a control system that must be wired and tested correctly.
Check:
- Power indicator
- Start button
- Stop button
- Emergency stop
- Manual and automatic mode
- Lighting control
- Music control
- Rotation direction
- Warning signals
- Safety-related circuits
Do not open the ride to the public before the control system has passed testing.

Sensor Installation and Calibration
Many modern Tagada amusement rides use sensors or position feedback systems to support smoother movement and control. Sensor installation is often overlooked, but it can affect ride stability and fault frequency.
Sensor Installation Rules
If the model includes a rotational position sensor, it should be installed securely and aligned correctly with the main rotating structure.
Good practice includes:
- Align the sensor with the rotational axis.
- Keep the mounting position stable.
- Use anti-loosening screws or locking washers.
- Keep signal cables away from high-power motor cables.
- Protect the sensor from dust, water and vibration.
- Follow the manufacturer’s wiring diagram.
For precision sensors, even a small alignment error may cause unstable feedback. Some technical checklists use strict alignment references such as around 1mm deviation, but the final requirement should always follow the ride’s technical manual.
Calibration and Testing
After installation, the sensor should be calibrated before full-speed operation.
Recommended checks include:
- Zero-position calibration
- Slow manual rotation feedback test
- Forward and reverse rotation test
- Signal continuity check
- Interference check with lighting and music systems on
- Cable connection inspection
- Control panel response test
If the system shows position drift, delayed response, abnormal stopping or unstable motion, stop the ride and inspect the sensor, wiring and control settings before operation.
Safety Commissioning Before Public Operation
A newly installed Tagada ride should never open directly to passengers. It must first pass empty-load testing, function testing and operator training.
For broader safety planning, see our full guide on are Tagada ride safe.
Empty-Load Test
Start with a low-speed empty-load test before full operation. A practical commissioning method is to run the ride at low speed first, observe motion, listen for abnormal noise and check temperature rise.
Some technical teams may begin with a low-speed test such as around 10% of normal operating speed for a controlled period before moving to higher settings. The exact procedure should follow the manufacturer’s commissioning instructions.
During the test, check:
- Rotation smoothness
- Vibration
- Abnormal sound
- Motor temperature
- Bearing temperature
- Hydraulic or pneumatic response
- Control panel function
- Lighting and music stability
- Emergency stop response
For some mechanical checks, teams may monitor main bearing temperature and use a reference limit such as 65°C, but final acceptance should be based on the equipment manual and local technical rules.
Emergency Stop Test
The emergency stop system should be tested repeatedly before public use. In professional commissioning, the ride should stop quickly and reliably when the emergency stop is triggered.
Check:
- E-stop button visibility
- Immediate control response
- Braking reliability
- Reset procedure
- Operator access
- Whether all staff understand emergency operation
Some technical checklists use a fast braking target such as less than 0.5 seconds, but the correct acceptance criterion depends on the specific ride design and manufacturer instructions.
Final Acceptance Checklist
| Test Item | What to Check |
| Foundation / Support | Base is stable, level and secured |
| Main Structure | Frame, bolts and welded areas are checked |
| Turntable | Rotation is smooth without abnormal noise |
| Motor / Drive | Direction, speed and response are correct |
| Hydraulic / Pneumatic System | No leakage, stable movement and correct pressure |
| Sensor System | Position feedback is stable and calibrated |
| Control Panel | Start, stop, manual and automatic modes work |
| Emergency Stop | Ride stops reliably when triggered |
| Lighting System | LED lights work normally |
| Music System | Sound system is stable and controllable |
| Handrails | Fixed firmly with no looseness |
| Padding | Complete, soft and properly fixed |
| Safety Fence | Stable and correctly positioned |
| Cable Layout | Protected and away from passenger routes |
| Trial Run | Completed before public operation |
| Operator Training | Staff understand procedures and emergency rules |


Outdoor, Indoor and Coastal Installation Notes
Outdoor Installation
Outdoor Tagada ride installation must consider rain, sunlight, wind, drainage and corrosion.
Plan for:
- Rain protection for the control cabinet
- Drainage around the foundation
- Anti-rust treatment
- UV-resistant surface materials
- Strong fencing
- Weather stop policy
- Night lighting
- Secure cable protection
Indoor Installation
Indoor venues must consider floor load, ceiling height, access route, ventilation, fire exits and visitor flow.
Mini disco Tagada rides are more suitable for indoor use than large 40-seat models, but the venue must still be checked before purchase.
Coastal or Humid Locations
For seaside parks, humid regions and island markets, corrosion protection is especially important. Salt air can affect steel, bolts, electrical boxes and sensors.
Buyers in coastal markets such as the Philippines, Australia, South Korea and other seaside tourist areas should consider:
- Stronger anti-corrosion coating
- Sealed electrical cabinet
- Regular rust inspection
- Protected fasteners
- More frequent maintenance
- Careful spare parts storage
If your project must meet recognized local or international inspection requirements, ask your local authority or inspector which standards apply. Buyers can also refer to industry resources such as IAAPA’s overview of ASTM amusement ride standards and the CEN-CENELEC introduction to the EN 13814 series for general safety context. Final compliance should always follow your local regulations.
Common Tagada Ride Installation Mistakes
Avoid these mistakes before opening your attraction:
1. Only Measuring the Turntable Diameter
The turntable diameter is not the full footprint. You must also plan for stairs, platform, fence, queue line, operator position and maintenance access.
2. Ignoring Ground Bearing Capacity
A disco Tagada ride creates dynamic load. A surface that looks flat may still be too weak for long-term operation.
3. Placing the Control Cabinet in a Poor Position
The operator must see the whole ride. Poor visibility slows emergency response.
4. Running Cables Through Passenger Routes
Power cables and signal cables should be protected and routed away from rider access and wet areas.
5. Skipping Sensor Calibration
Incorrect sensor feedback can cause unstable movement, control errors and unnecessary downtime.
6. Opening Without Empty-Load Testing
Every function should be tested before passengers enter the ride.
7. Not Training Operators
Tagada safety depends heavily on the operator’s ability to control speed, observe riders and stop the ride when needed.
8. Choosing a Supplier Only by Low Price
Low-cost equipment may lack accurate drawings, installation guidance, spare parts, control documentation and after-sales support.
If you are comparing suppliers, our article on top Tagada ride manufacturers explains what buyers should check before choosing a manufacturer.

What Buyers Should Ask Before Installation
Before ordering a Tagada ride, ask the manufacturer these questions:
| Buyer Question | Why It Matters |
| What installation space is required? | Helps plan layout and safety distance |
| Do you provide 2D or 3D layout drawings? | Helps confirm equipment position and visitor flow |
| What foundation is required? | Prevents vibration and stability problems |
| What power supply is needed? | Avoids electrical mismatch |
| Can voltage and frequency be customized? | Important for international buyers |
| What unloading equipment is needed? | Helps prepare forklift or crane access |
| Is safety fencing included? | Affects site safety and final cost |
| Do you provide operation manuals? | Supports staff training |
| Do you provide maintenance manuals? | Supports long-term safety |
| Are spare parts available? | Reduces downtime |
| Can I inspect the factory? | Helps verify supplier capability |
| Do you have similar project cases? | Shows real installation experience |
For a full buying framework, you can also read our guide on how to choose a Tagada ride.
Why Choose Carnee Rides for Tagada Ride Installation Support
Carnee Rides offers commercial Tagada rides for sale, along with custom amusement ride solutions for amusement parks, funfairs, carnivals, night markets, tourist attractions, and indoor entertainment centers.
We support buyers with:
- Mini, standard and large Tagada ride options
- Fixed and trailer-mounted Tagada ride solutions
- 2D and 3D layout design support
- Foundation and site planning suggestions
- Voltage and power confirmation
- Custom theme, LED and music design
- Installation drawings
- Control system guidance
- Operation and maintenance manuals
- Safety configuration suggestions
- Export packing and shipping support
- Factory inspection support
- Spare parts and after-sales service
Carnee Rides is a source amusement ride manufacturer. We help buyers plan the complete project, not just purchase a machine. Whether you need a mini Tagada ride for an indoor FEC, a 24-seat disco Tagada for a local funfair, a 30-seat Tagada carnival ride for a night market or a 40-seat extreme Tagada ride for an outdoor amusement park, our team can recommend a practical configuration based on your site, visitor flow and budget.
If you are still estimating investment, our article on how much is a Tagada ride explains price ranges, seat capacity and ROI planning.
For broader questions about models, safety, operation and buying decisions, visit our Tagada ride FAQ guide.


FAQ About Tagada Ride Safety
Conclusion: Safe Tagada Ride Installation Starts Before Delivery
A successful Tagada ride installation starts with planning. Buyers should prepare the site, foundation, power supply, fencing, access route, control cabinet position, queue area and testing process before the equipment arrives.
For a dynamic ride like the disco Tagada, installation quality affects safety, ride experience, maintenance cost, inspection approval and long-term ROI.
Carnee Rides can help you choose the right Tagada ride model, design the layout, confirm installation requirements and provide factory-direct support for your amusement park, carnival, funfair, night market or FEC project.
Contact Carnee Rides today to get a customized Tagada ride installation plan and factory-direct quotation.
References
Safety Standards
- EN 13814-1:2019+A1:2024 — Design and manufacture of amusement rides. European Committee for Standardization (CEN). standards.iteh.ai
- EN 13814-2:2019 — Operation, maintenance and use of amusement rides. European Committee for Standardization (CEN).
- EN 13814-3:2019+A1:2024 — Inspection requirements for amusement devices. European Committee for Standardization (CEN).
- IEC 60364-7-711 — Electrical installation requirements for amusement rides and fairground structures. International Electrotechnical Commission. webstore.iec.ch
- HSE Operator Guidance — Tagada Rides. UK Health and Safety Executive. adips.co.uk
Industry Resources
- IAAPA — Ride Safety Regulation. iaapa.org/safety/ride-safety-regulation
- ASTM F24 Committee — Safety Standards for Amusement Rides. store.astm.org


