
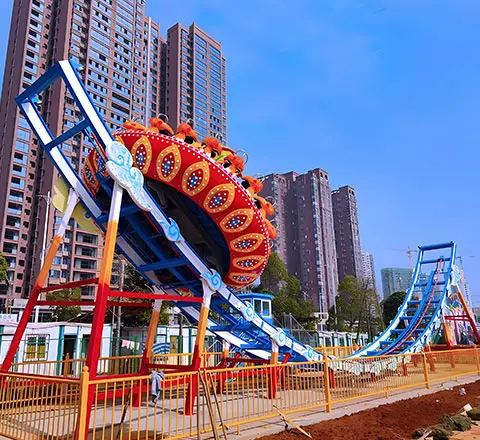


Installing a large amusement ride is not just assembly work. It is a controlled engineering project that combines civil works, lifting operations, mechanical and electrical integration, functional safety verification, and regulatory approval.
This guide explains a practical, field-tested large amusement ride installation process—from site readiness to acceptance testing—so owners, EPC contractors, and park developers can reduce risk, protect schedule, and open with confidence.
Note: Requirements vary by country and local Authority Having Jurisdiction (AHJ). Always follow the manufacturer’s manual and your local regulations.


What Counts as a Large Amusement Ride
In this article, large amusement rides typically include equipment that requires engineered foundations, cranes, specialized installation teams, and formal commissioning, such as:
- Large Ferris wheels (such as a 89m ferris wheel )
- Big Roller coasters (such as 6 loop roller coaster, a suspended roller coaster)
- 40 Seats Large Pirate ship rides
- Giant pendulum rides
- Large carousel systems (high capacity, such as a double-decker merry-go-round)
- Trackless or track rides with substantial structural components
These giant amusement park rides often fall under stricter safety oversight and demand more documentation and inspection discipline than compact family rides.
Standards and Regulations to Consider Before Installation
Most successful amusement equipment installations start by aligning the project with recognized safety frameworks and local rules.
Commonly referenced standards include:
- ASTM F24 standards are widely used for ride safety practices across design, manufacture, operation, maintenance, and inspection.
- EN 13814 series (Europe and many international markets), structured into parts that cover design/manufacture and also operation/maintenance/use.
- ISO 17842 series, an international framework covering safety requirements for amusement rides and devices (including design/manufacture and installation considerations).
- IAAPA ride commissioning guidance, which emphasizes planning, testing, and documentation when bringing rides into service.
What this means in practice
Even if you are not required to “comply with ASTM/EN/ISO” by law, inspectors, insurers, and professional operators often expect your procedures and records to align with these frameworks.

Pre-Installation Planning: The Checklist That Prevents Costly Rework
Before any crates arrive, confirm the site can support installation safely and without schedule surprises.
Site survey and layout verification
Focus on:
- Amusement Ride footprint, clearance envelopes, and evacuation routes
- Visitor circulation (queues, exits, emergency access)
- Crane access and staging zones
- Underground utilities (power, drainage, telecom)
- Wind exposure and drainage (outdoor projects)
Foundation and load requirements
Large fairground rides fail schedules most often due to foundation issues, not because of missing bolts.
Confirm:
- Soil bearing capacity and geotechnical data (as required)
- Concrete grade, rebar schedule, and embedded parts
- Anchor bolt templates and tolerance control
- Survey control points and verification during pouring
Utilities and power readiness
Before amusement attractions installation:
- Confirm voltage, frequency, phase, and available amperage
- Verify grounding/earthing plan and lightning protection strategy
- Plan cable routing, conduits, control room space, and emergency stops
- Ensure communication pathways for safety systems and sensors
Practical tip: Treat “power quality + grounding” as a reliability project, not a wiring task. Poor grounding and surge protection often show up later as nuisance faults and downtime.
Define Roles and Responsibilities Early
One major reason large theme park ride projects slip is unclear boundaries between the owner, civil contractor, ride supplier, and third-party inspector.
Here is a practical division that many projects use:
| Project Area | Typical Responsible Party | Key Deliverable |
| Site clearance, foundation, drainage | Owner / Civil contractor | Foundation acceptance report, as-built survey |
| Ride installation guidance | Electrical supply to the distribution point | Installation manual, supervision plan |
| Lifting plan and crane operations | Certified rigging/lifting contractor | Lift plan, rigging inspection, operator certificates |
| Electrical supply to distribution point | Owner / Electrical contractor | Power readiness, grounding verification |
| Ride wiring and control integration | Manufacturer team + licensed electricians | Wiring checklist, insulation tests, functional checks |
| Commissioning & acceptance testing | Manufacturer + owner + inspector | Test records, punch list closure, handover package |

Step-by-Step Large Amusement Ride Installation Process
1) Delivery, unloading, and open-box inspection
Upon arrival:
- Check crate condition and packing list
- Verify model/spec matches contract
- Inspect critical amusement ride components, including drive systems, restraints, and control cabinets.
- Confirm documents are present (manuals, certificates, drawings, QA records)
Document everything with photos and signed checklists. This becomes your baseline evidence if issues appear later.
2) Baseline survey and foundation re-check
Before assembly begins:
- Re-verify anchor bolt positions and elevations
- Confirm embedded plates and reserved holes match drawings
- Check foundation flatness and reference lines
- Validate tolerances against the amusement ride manufacturer’s requirements
If you find anchor drift or an elevation mismatch, solve it before the steel goes up.
3) Lifting and structural assembly
Treat assembly like a controlled build:
- Arrange components in installation order
- Protect coated or decorative surfaces from damage
- Use calibrated torque tools
- Follow torque sequences and fastening specifications
- Mark critical fasteners after final torque (visual control)
For tall structures (e.g., Ferris wheels), ensure the lift plan is engineered and site-specific—never “copy-paste” from another project.
4) Mechanical installation and alignment
Core tasks usually include:
- Drive system installation (gearbox, motor, hydraulic units if applicable)
- Lubrication system setup
- Alignment checks (shafts, couplings, track alignment if applicable)
- Brake system installation and verification
- Restraints and gates installation
5) Electrical installation, grounding, and control wiring
Key checks:
- Cable routing and protection (conduits, trays, sealing)
- Cabinet installation and environmental protection (dust, humidity)
- Insulation resistance tests
- Grounding continuity verification
- Safety circuit verification (E-stops, interlocks, sensors)
Electrical quality is a long-term uptime driver. Poor routing or grounding may “work” on opening day and still cause recurring faults later.
6) Commissioning and functional verification
IAAPA’s commissioning guidance highlights the value of a planned, documented commissioning program. (IAAPA.org)
A typical progression:
- No-load tests: motion profile, braking, limits, interlocks
- Partial-load tests: verify performance under controlled load
- Full-load tests: confirm stability, temperature rise, braking distance
- Fault simulations: validate safety responses (where permitted and safe)
Every run should be documented with date/time, parameters, and results.
7) Acceptance testing and handover
Before public opening:
- Close all punch-list items
- Confirm signage, fencing, and access control are in place
- Complete operator training and emergency drills
- Prepare final handover package (manuals, drawings, test reports, inspection records)

Common Installation Risks and How to Avoid Them
Foundation deviation and anchor bolt misalignment
Risk: delays, rework, structural stress
Prevention: templates, repeated survey checks, and as-built validation before assembly
Uncontrolled torque management
Risk: audit failure, long-term loosening, safety hazards
Prevention: calibrated tools, torque logs, marking after tightening
Weak documentation discipline
Risk: approval delays, insurance problems, and hard troubleshooting later
Prevention: daily logs, photo records, signed checklists, revision control
Electrical noise and grounding issues
Risk: nuisance faults, sensor errors, downtime
Prevention: proper earthing, surge protection, clean routing, and insulation testing
Installation Timeline and Cost Drivers
Typical timeline (depends on ride type and site readiness)
A realistic schedule is driven by:
- Foundation curing and readiness
- Crane availability and weather windows
- Amusement Park Ride complexity (height, track length, subsystem count)
- Inspection lead times
Cost drivers to expect
- Civil works complexity (soil, drainage, reinforcement)
- Lifting operations (crane tonnage, multiple lifts, site restrictions)
- Electrical scope (distance to power source, grounding, lightning protection)
- Local compliance requirements and third-party inspection fees
- Labor availability and site access constraints
Post-Installation: What “Good Maintenance Readiness” Looks Like
Many ride problems are created during installation and only appear months later. Build maintenance readiness during commissioning:
- Create site-specific SOPs based on the amusement park ride manufacturer’s manual
- Train operators with checklists, not just verbal guidance
- Start preventive maintenance planning (daily/weekly/monthly/annual)
- Establish a spare parts plan for wear items and long-lead components
- Keep inspection logs and change-control records audit-ready
Standards and industry guidance emphasize lifecycle safety management—design, operation, maintenance, and inspection working together as one system.
A Practical “Go/No-Go” Checklist Before Opening Day
Use this as a final gate:
- Foundation acceptance documented and signed
- Assembly complete with torque records for critical joints
- Electrical insulation and grounding tests completed
- Safety circuits verified (E-stops, interlocks, sensors)
- No-load and load tests documented
- Third-party inspection completed (where required)
- Operator training + emergency drills completed
- Manuals, drawings, and handover documents archived

How Carnee Rides Supports Installation and Long-Term Operation
With more than 20 years of experience in amusement ride manufacturing and project delivery, Carnee Rides provides practical and flexible support throughout the installation and operation of large amusement rides.
During the installation phase, Carnee Rides offers video-based remote installation guidance or on-site support by experienced engineers, depending on the complexity of the equipment and the customer’s project requirements. This ensures that structural assembly, torque control, electrical wiring, and commissioning activities are carried out in strict accordance with the technical drawings and the operation and maintenance manual.
Once installation is completed, Carnee Rides provides comprehensive operator and maintenance training to help the customer’s team gain confidence in day-to-day operation. Training is conducted in a hands-on manner and typically covers:
- No-load testing procedures and inspection points
- Loaded trial operation and parameter verification
- Pre-opening operational testing and safety checks
- Daily operation practices and basic troubleshooting
Support continues after the ride enters service. Carnee Rides maintains close communication with customers during the early operation period, monitoring performance and gathering operational feedback. When questions or issues arise, the after-sales team responds promptly with technical advice, remote assistance, or on-site service when necessary.
Our objective is straightforward:
to help customers achieve safe installation, reliable operation, and predictable lifecycle performance for their amusement ride investment.
(See more: Essential Guide to Amusement Park Ride Maintenance)
Conclusion
A large amusement ride installation is successful when it is treated as a disciplined engineering program: foundation accuracy, controlled assembly, verified electrical quality, structured commissioning, and complete documentation.
If you plan the site rigorously, execute installation with calibrated processes, and commission methodically, you reduce risk, protect uptime, and deliver a safer guest experience—on opening day and throughout the ride’s lifecycle.


